Lesson 4: Managing Files

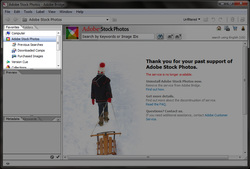
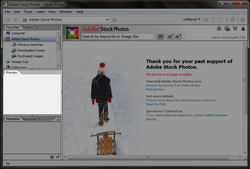
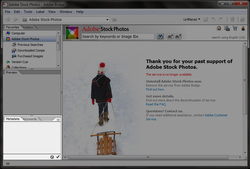
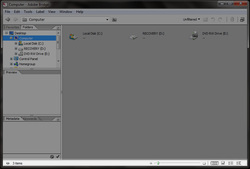
The file management system used in Adobe Photoshop is an add on application called "Adobe Bridge." The workspace of Adobe Bridge has four panes in its browser window. The three left panes are like palettes in Photoshop and can be rearranged, resized, and grouped . The Adobe Bridge palette windows help you navigate, preview, search, and manage information for your image files and folders.
Window Panes
The Directory Panel
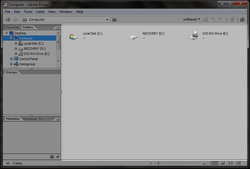
The top left palette panel (window pane) of Adobe Bridge is a directory window that allows you to search and open files on your computer. It has two tabs- the Favorites tab and the Folders tab.
The Favorites Tab shows areas of the computer. You can add and remove folders and items that you feel are important to use.
The Folders Tab shows the folders that are on the computer. Each folder will have a plus (+) or minus (-) sign by it. If the plus sign is visible, the folder is closed and can be open by clicking once on the plus sign. The minus sign will appear next to any open folders. If you click on a minus sign, the folder will close and a plus sign will appear next to the folder.
The Preview Panel
The middle left window is a preview window that shows you the image information about the file you are selecting on your computer.
When you click once on the images in the right window pane, a smaller image of your selected file will appear in the middle window. This will allow you to see a better view of your selected file or image.
When you click once on the images in the right window pane, a smaller image of your selected file will appear in the middle window. This will allow you to see a better view of your selected file or image.
The Metadata Panel
The bottom left window is a metadata window that identifies specific details about the image files on your computer. Metadata is information that is added to the image but is not visible when it is viewed. This information includes the size of file and the resolution of the file. The file size and resolution information is automatically created and attached to the file when it is created in Adobe Photoshop. When the image is captured with a digital camera, information about the camera settings can be automatically recorded. Other metadata information can be added manually.
The Content Panel
The right window shows thumbnail images of the files or images on your computer. When you click once on these icons, it will select the file or image and show the image in the preview window. When you click twice on an image, the image will open in Adobe Photoshop.
Toggling Menu
The bottom of the Bridge window displays status information and contains buttons for toggling the display of the panels, a slider for setting the size of thumbnails, and buttons for specifying the type of display in the content area.
Image Orientation

When you rotate your camera to take a portrait (taller subject) shot it will open in Adobe Bridge rotated to a horizontal rather than vertical shot. Adobe Bridge has orientation buttons located in the upper left hand corner of the screen. After you select the image in Adobe Bridge, you can click on the left or right orientation button to rotate the image in that direction. Rotating and opening the thumbnail previews in Adobe Bridge do not affect the resolution or quality of the files, but the rotation is permanent until you undo it.
Note: This does not rotate the picture to the proper orientation when you send the image over the Internet. It only works within the Adobe Bridge and Adobe Photoshop programs.
Note: This does not rotate the picture to the proper orientation when you send the image over the Internet. It only works within the Adobe Bridge and Adobe Photoshop programs.
Deleting Images and Folders

You can use Adobe Bridge to remove files or folders from your computer exactly as you would remove them from your desktop. Deleting images in Adobe Bridge sends the files to the Recycle bin.
Using Adobe Bridge to examine your images, you can confidently select and delete files that you no longer need or that you find unsatisfactory.
You can rearrange thumbnails in Adobe Bridge as easily as you might move negatives or slides on a light table. You can also use a batch- renaming process to give image files more friendly, well-organized filenames.
Using Adobe Bridge to examine your images, you can confidently select and delete files that you no longer need or that you find unsatisfactory.
- Select the image or folder you want to remove from your computer.
- Click the "Delete Item" button (trash can) on the top right side of the Bridge browser window. When a message appears asking you to confirm this action,click "OK".
You can rearrange thumbnails in Adobe Bridge as easily as you might move negatives or slides on a light table. You can also use a batch- renaming process to give image files more friendly, well-organized filenames.
Rearranging Images
You can rearrange the images according to any category you choose to use. As an example, if you have images of the clouds, flowers, and cars, you could place all of the clouds images next to other cloud images by these images next to the similar images by clicking on each image and dragging it next to another similar image and releasing the mouse button.
To rearrange similar images that are next to one another, hold down the shift key, click once on the first image you want to choose and the last image you want to choose. Drag all of the selected images next to the similar images where you want them.
If the images are not next to each other, select the images while holding down the alt key on the keyboard. Then drag the images next to the images where you want them.
Renaming Images
There are 2 procedures you can use to rename images.
1. Single Files
You can rename a single file in Adobe Bridge by clicking the filename in the thumbnail preview area and typing the new name. The second procedure is much faster and will be used more often when you do not have a lot of time to spend managing your files.
2. Multiple Files
The Batch Rename command behaves differently depending on what is selected when you choose the command. If no thumbnails are selected, the naming scheme you specify in the Batch Rename dialog box applies the name change to all the selected folder. If several "but not all" thumbnails are selected, the command renames only the selected files.
Embedding Information
The goal as a photographer is to spend more time working with people rather than spending time working at a computer. To do this requires a quicker way of managing files. Adobe Bridge uses information that is added to the images to organize them. This information is called photographic Metadata. It includes exposure information, developing information, file creation date and time, file modification date and time, etc.
This information does not appear on the image but can be accessed through Adobe Bridge and screen features on the camera.
This information does not appear on the image but can be accessed through Adobe Bridge and screen features on the camera.
Ranking Images

Adobe Bridge has a star-ranking feature that you can use to group and sort image thumbnails. This gives you an alternative way to organize images in the thumbnail preview area. You can use star rankings to indicate anything, such as, subject matter, client, project name, or time of day. How you use the stars to rank your images and how many stars you assign to each image is a personal judgment.
Labeling Images
You can organize your images are more than the Quality of the image. You might want to organize your files on the subject matter, client, project name, or time of day, for example. Indeed, if you want to organize your image by multiple factors, for instance, by quality and by project, you can also apply colored labels to your images. Yellow labels might be applied to a Web project, while red labels could indicate that the image will be used for a print brochure.
Applying Keywords
The keywords palette organizes keywords in categories that you can expand and collapse. It standardizes keywords so that you can apply identical terms to specific types of images. This will greatly reduce the risks of occasional typographic errors or inconsistencies that can turn quick keyword searches into a time consuming image nightmare. If you have a large collection of images, the few seconds required to enter some well-chosen keywords can save you hours later as you try to locate specific images.
