Lesson 2: Composition
When you think about the world and the communication between people of different nationalities, there are two forms of communication that are understood by everyone. These require no explanation because there are no limitations created through language barriers. These two forms of communication are music and photography.
The musician uses his notes and rhythms to create his masterpiece. The notes are his tools and the rhythms and beats are the rules he must follow in order to have the notes make sense. His arranging of the notes, rhythms, and beats become his composition.
The photographer also has tools and rules that he must follow to create his masterpiece. The tools he has available to him are the artistic elements that are visible in his photograph. The rules he must follow to arrange them so they make sense to the viewer are the artistic principles. How the photographer combines the elements and principles of art in the photograph become his composition. With this explanation, we could then define composition as the arrangement of the various elements within a photograph.
Your responsibility as the photographer is to decide which visual elements your photograph will contain. You are also responsible for the content of every square inch of your photograph. While this might be a daunting thought initially, there are some general guidelines to consider before making your photographs. As you gain more experience at working with this information, your compositions will improve.
There are no hard and fast directions for crafting good compositions. There are no "rules of composition" written in stone. A creative photographer starts by acknowledging that compositional issues exist, and then finds ways of breaking all traditional conventions if necessary to convey his intention for the photograph. Your visual interpretation of your intention will guide your decisions about composition.
Elements of Art
Often when people look at works of art and photographs, they identify the trees, flowers, people, and things in the photograph. However, they do not really pay attention to all of the information that is available to see. The many lines, shapes, spaces, forms, textures, and colors are overlooked to see the picture. Each of these items is an element of art.
Each of these distinctive elements are important to us as photographers because they are the tools you have to create the final photograph that your audience will see. As we discuss each of these elements, identify how you can arrange them into each of the photographs you will take throughout the remainder of the term.
Each of these distinctive elements are important to us as photographers because they are the tools you have to create the final photograph that your audience will see. As we discuss each of these elements, identify how you can arrange them into each of the photographs you will take throughout the remainder of the term.
Line
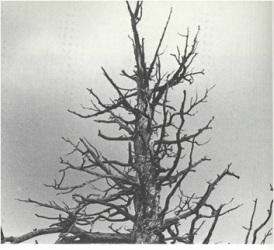
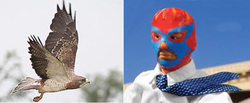
The easiest element to identify in objects is the Line. A line represents a "path" between two points. It can be straight, curved, vertical, horizontal, or zig-zag. Lines imply motion and suggest direction or orientation. A line can also be implied, or imaginary, and does not have a beginning or ending mark. An example of this is the mountain range.
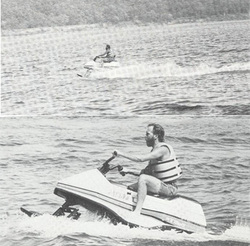
The direction and orientation of a line can also imply certain feelings. Horizontal lines imply tranquility and rest, whereas vertical lines imply power and strength. Oblique lines imply movement, action, and change. Curved lines imply quiet, calm, and sensual feelings. Lines that converge imply depth, scale, and distance. Converging lines also create a three-dimensional illusion in a flat two-dimensional image.
There are two basic types of line. Contour Lines outline the shape of an object or person. It defines the silhouette of the object or person. Axis Lines give detail within the subject.
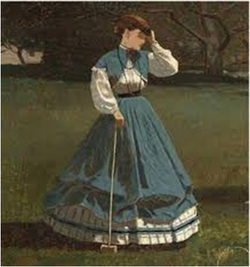
Shape

Shapes are the result of closed lines. However shapes can be visible without lines when an artist establishes a color area or an arrangement of objects within the camera's viewfinder. All shapes are limited to 2 dimensions, length and width. We identify them by geometric names: circle, square, rectangle, triangle. Any geometric figure is a shape of 2 dimensions. Look carefully at the objects in your photographs and try to identify the shapes that are created by their contours.
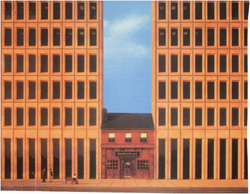
Form

A form can be thought of as a shape in three dimensions since it includes the added dimension of depth. You cannot actually hold a shape, but you are able to do so with forms. Two important features of form are mass and volume. Mass refers to the outside size and bulk of a form. When discussing mass of an object or building, the vocabulary of geometry is used. This allows you to describe more clearly a three-dimensional work as resembling a sphere (ball), cube, pyramid, cylinder, or a cone.
However, this does not mean that a sculpture or building must be solid. And you can use them when describing a contemporary sculpture made of transparent plastic and wire or a cathedral. Both of these enclose space, but the sculpture in this instance does not have solid, opaque surfaces or walls, while the cathedral does.
However, this does not mean that a sculpture or building must be solid. And you can use them when describing a contemporary sculpture made of transparent plastic and wire or a cathedral. Both of these enclose space, but the sculpture in this instance does not have solid, opaque surfaces or walls, while the cathedral does.
Space
Space is defined and determined by shapes and forms. Positive space is where shapes and forms exist; negative space is the empty space around shapes and forms. For images to have a sense of balance, positive and negative space can be used to counter balance each other.
When you capture an image, your subject should be the positive space of your picture.
When you capture an image, your subject should be the positive space of your picture.
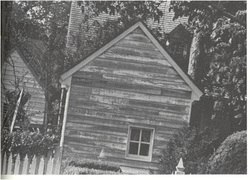
Texture
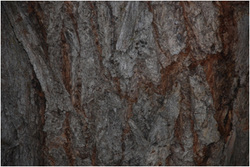
Whenever you talk about the surface quality or "feel" of an object, you are referring to its texture. In many cases, you will identify the texture by how it appears to feel in a picture. The actual feel of the picture will be smooth, however, the way the surface of the object appears may be smooth or rough. It is common to put a laminate surface on furniture and cabinets. The look is wooden. When you touch the surface, however, it is very smooth. The appearance of surfaces of the objects is where the texture in the picture will be easy to see. A good question to ask yourself when identifying the texture is "How would that surface feel if I could touch it in real life?"
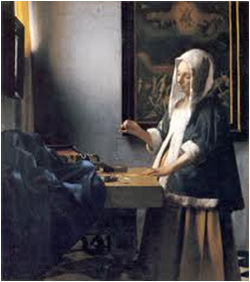
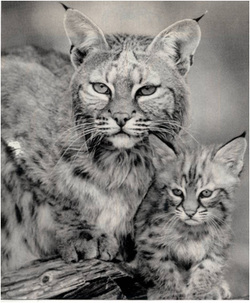
Value
Value, or tone, refers to the use of light and dark, shade and highlight, in an artwork. Black-and-white photography depends entirely on value to define its subjects. Value is directly related to contrast.
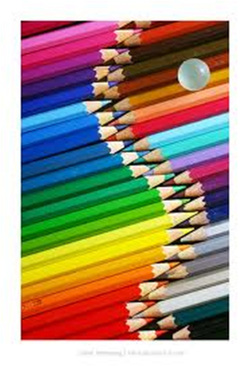
Color

The first element that most people identify in an object is color. Although there is a lot of color in the world, it is not completely understood by many people. Color is made up of three distinct qualities- Hue, Intensity, and value. You can easily discuss color using all three of these qualities or any one of these qualities independent of another.
Hue refers to the name of the color- Blue, Green, Red, Orange, etc. The term is used to point out these differences.
Intensity refers to the color's quality of brightness and purity.
Value refers to the lightness or darkness of the hue. It can be changed by adding black or white to the color.
Hue refers to the name of the color- Blue, Green, Red, Orange, etc. The term is used to point out these differences.
Intensity refers to the color's quality of brightness and purity.
Value refers to the lightness or darkness of the hue. It can be changed by adding black or white to the color.
Assignment 5: Shooting 2- Artistic Elements
Shoot at least 5 pictures of each element of art. Try to capture each element so that it is very easy to see. You should have a minimum of 35 pictures showing elements of art.
Upload your pictures onto the computer. Save them in a new folder named "Elements"
Upload your pictures onto the computer. Save them in a new folder named "Elements"
Assignment 6: Contact Sheet 2- Artistic Elements
Complete and submit a contact sheet of all of the element pictures you take. Each picture should show an element of art. Each picture should be named by the element of art that it shows (emphasizes). (Review lesson 1 for instructions)
Submit the contact sheet for grading.
Submit the contact sheet for grading.
Principles of Art
Artistic principles are the rules we must follow when we arrange the elements of art into an organized whole. The key in composing great pictures is understanding those principles before we take the pictures. The principles of art then describe the different ways artists can use each element.
Balance
Balance refers to a way of combining elements to add a feeling of equilibrium or stability to a work of art. Balance can be of two kinds: symmetrical or asymmetrical.
Symmetrical Balance

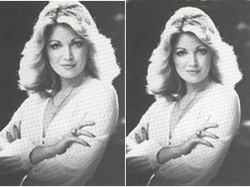
Symmetrical balance means a formal balance in which two halves of a work are identical; one half mirrors the other half. This is the simplest kind of balance and is usually found to produce the least interesting composition.
Try This:
With a partner, friend or parent, stand and face one another. Stand comfortably with both feet next to each other, about a foot apart. Look at the feet of the individual in front of you. The two feet look like mirror images of one another. This is symmetrical balance.
Asymmetrical Balance
Asymmetrical balance is more informal and takes into account such qualities as hue, intensity and value in addition to size and shape. All these qualities have an effect on the apparent "weight" of objects in a work of art. It is possible to balance a large white shape at one side of a picture with a similar large white shape at the other side. However, a smaller black shape may accomplish the same result. The result is a "felt balance." The dark value of the smaller shape makes it appear heavier and equal to the task of balancing the larger white shape.
Try This:
With a partner, friend, or parent, stand up and face one another. Stand comfortably with both feet next to each other, about a foot apart. Now lift one of your feet. Notice how your body shifts to compensate for the difference in balance. Look at the feet of the individual in front of you. The two feet look no longer like mirror images of one another. This is asymmetrical balance.
Emphasis
Emphasis is a way of combining elements to stress the differences between those elements. Often, emphasizing elements will direct and focus the viewer's attention on the most important parts of a design. It is a good practice to avoid creating pictures in which the same colors, values, lines, shapes, forms, textures, and space relationships are used over and over again. This creates a boring picture that causes little or no visual interest for the viewer.
Practicum:As you view subjects for photography, try to see the object differently than normal. Change the position of the camera- move in really close, move back, turn the camera on an interesting angle. This will cause you to see the subject outside its normal position in the world. Most importantly, be creative.
Practicum:As you view subjects for photography, try to see the object differently than normal. Change the position of the camera- move in really close, move back, turn the camera on an interesting angle. This will cause you to see the subject outside its normal position in the world. Most importantly, be creative.
Harmony
Harmony refers to a way of combining similar elements in an artwork to accent their similarities. This is accomplished through the use of repetitions and subtle, gradual changes. Complex, intricate relationshjips are avoided in favor of a more uncomplicated, uniform appearance. Often, a limited number of like elements is used in an effort to tie the picture parts together into a harmonious whole.
Another suggestion would be to use the KISS method of design. Keep it short and simple. This would mean to use only the elements that are necessary and arrange them so the intended message of your picture is easy to understand.
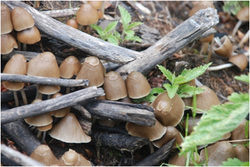
Practicum:The natural elements that exist in the world are the best example of harmony. They have a harmonious relationship. Take a few minutes and look at the natural elements of the world. Really study them. Try to identify how the grass, dirt, leaves, trees, animals, and mountains exist together. When you realize the harmony among them, you will see that everything in a photograph can also have a harmonious relationship if you take time to arrange the elements before taking the picture.
Another suggestion would be to use the KISS method of design. Keep it short and simple. This would mean to use only the elements that are necessary and arrange them so the intended message of your picture is easy to understand.
Practicum:The natural elements that exist in the world are the best example of harmony. They have a harmonious relationship. Take a few minutes and look at the natural elements of the world. Really study them. Try to identify how the grass, dirt, leaves, trees, animals, and mountains exist together. When you realize the harmony among them, you will see that everything in a photograph can also have a harmonious relationship if you take time to arrange the elements before taking the picture.
Variety

Variety is a way of combining elements in involved ways to create intricate and complicated relationships. It is achieved through diversity and change. Artists turn to this principle when they want to increase the visual interest in their works. A picture made up of many differenct hues, values, lines, textures, and shapes would be described as complex.
A carefully determined blend of harmony and variety is essential to the success of almost any work of art. Artists who concentrate on harmony but ignore variety may find it easier to achieve balance, but also at the expense of interest.
Note: Both Harmony and variety must be taken into account during the creative process. Harmony aids efforts to blend the picture parts together to form a unified whole. Variety enables the artist to add visual interest to this unified whole. It is this visual interest that attracts and holds the attention of viewers.
Gradation

Gradation refers to a way of combining elements by using a series of gradual changes in those elements. For example, a gradual change from small shapes to large shapes, or from a dark hue to a light hue, would be gradation.Unlike emphasis, which often stresses sudden and abrupt changes in elements, gradation refers to an ordered, step-by-step change.
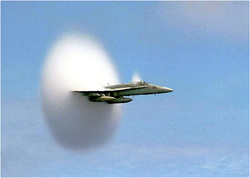
Movement
Movement can be defined in two ways. 1) a way of combining elements to produce the look of action. An example of this would be a horse pictured at full gallop; giving the impression of action. 2) a way to cause the viewer's eyue to sweep over the work in a certain manner. This is achieved through placement of elements so that the eye follows a certain path, as the curve of a line, the contours of shape, or the repetition of certain colors, texture, or shapes.
Rhythm
Rhythm is closely associated with movement. It is often realized through the careful placement of repeated elements in a work of art to create a visual tempo or beat. These repeated elements invite the veiwer's eye to jump rapidly or glide smoothly from one element to the next.
For example, the same shape may be repeated several times and arranged across the picture to create the sensationof movement in a certain diection. As the viewer's eye sweeps from one shape to the next, this senasation is heightened. Sometimes visual contrasts set up a rhythm when repeating elements are combined with contrasting colors, values, shapes, lines or textures.
For example, the same shape may be repeated several times and arranged across the picture to create the sensationof movement in a certain diection. As the viewer's eye sweeps from one shape to the next, this senasation is heightened. Sometimes visual contrasts set up a rhythm when repeating elements are combined with contrasting colors, values, shapes, lines or textures.
Proportion
Proportion refers to the size relationship of elements in the picture. In the older works of art, the main characters, or intended objects, were made larger than the rest of the people or items in the picture. This would draw the viewer's attention to that part of the picture.
Unity
Unity may be thought of as an overall concept- or principle. It describes the total effect of a work of art. All artists draw from the same reservoir of elements and principles, but few are able to take those elements and principles and fashion works of art that are unique, exciting, and complete. Those who do, achieve what is referred to as unity.
As you take each picture, you must consciously think about the intricate relationships of each principle and element we have discussed. If you successfully each element and principle in every photograph, without distracting from the intended meaning of the photograph, you will have a solid grasp on the concept of Unity.
As you take each picture, you must consciously think about the intricate relationships of each principle and element we have discussed. If you successfully each element and principle in every photograph, without distracting from the intended meaning of the photograph, you will have a solid grasp on the concept of Unity.
Assignment 7: Shooting 3- Artistic Principles
Shoot at least 5 pictures of each principle of art. Try to capture each principle so that it is very easy to see. You should have a minimum of 40 pictures showing principles of art.
As you improve as a photographer, you should keep a record of your pictures as you shoot them. For each picture write down the weather and lighting conditions, name of subject, visible principles of art, and the principle of art you are trying to emphasize.
As you improve as a photographer, you should keep a record of your pictures as you shoot them. For each picture write down the weather and lighting conditions, name of subject, visible principles of art, and the principle of art you are trying to emphasize.
Assignment 8: Contact Sheet 3- Artistic Principles
Rules of Composition
1. Fill the Entire Screen
Only shoot what you want included in the picture. Empty space is wasted space.
This is application of the artistic element Emphasis
This is application of the artistic element Emphasis
Assignment 9: Shooting 4- Fill Screen
You may use any subjects you desire to shoot. As you take the pictures, make sure you fill the frame with your subject.
Assignment 10: Contact Sheet 4- Fill Screen
You will submit two files for this assignment.
Create and submit a contact sheet of all of the pictures you take of your subject. Each picture should show your subject as the focus of the picture. (emphasis).
Create and submit a contact sheet of all of the pictures you take of your subject. Each picture should show your subject as the focus of the picture. (emphasis).
Assignment 11: Enlargement 1- Fill Screen
Choose your best picture. Enlarge it to an 8 x 10 inch picture and submit it for grading.
2. Avoid Tilted Lines
Keep your horizontal and vertical lines parallel to the ground.
3. Create a Clean Background

If the background is a problem during shooting, it will be worse for your audience.
4. Use the Rule-of-Thirds
When shooting people with a camera, frame the eyes one-third down from the top of the frame no matter what the type of shot you are taking.
5. Direct All Action Lines and Sight Lines Toward the Center of the Frame
Action or line of sight towards "frame right" should be framed on the left side.
Assignment 12: Shooting 5- Improving Composition 1
You may use any subjects you desire to shoot. As you take the pictures, make sure you fill the frame with your subject while paying attention to the rule of thirds and the Action/Sight Lines.
Assignment 13: Enlargement 2
Choose your picture that shows the best framing using Rule of thirds and Action/Sight Lines.
6. Avoid Big Spaces
Keep people and objects close together. Shoot people in full or three-quarter profile to let viewers see both eyes.
7. Use "Leading Line"
Create illusion of depth by having objects in the foreground, middle ground, and background.
8. Adjust Focus
Always "zoom in" to full telephoto to adjust focus.
9. Frame the Subject with Extra Spacing
Allow for image cutoff around frame edges. Keep the important parts of the image toward the center of the frame.
10. No Rule is Absolute
You must have a good reason to break any of the given rules. If it makes sense to take the picture. Take it.
Assignment 14: Shooting 6:
You may use any subjects you desire to shoot. As you take the pictures, make sure you fill the frame with your subject while paying attention to the rules of composition.
Assignment 15: Enlargement 3
Choose your picture that shows the best framing using the rules of composition
Assignment 9: Improving Compositions
In this assignment you will use the Adobe Photoshop software to create 3 new compositions from one of these pictures.
|
|
|
- Right click on one of the pictures and select "Copy Image."
- On the desktop, click on the Start button.
- On the left side of the Start menu, double-click the Adobe Photoshop CS2 icon to start Adobe Photoshop CS2.
- When prompted, click "Close" to close the Welcome Screen.
- Select File>New from the command menu bar.
- A New window will open. Enter the following information:
- Name: “9- Improving Compositions”
- Width: 10 inches
- Height: 8 inches
- Resolution: 300
- Color Mode: RGB Color 8bit
- Background Contents: White
- Click OK
- Add guides.
- Place your cursor over the center of the left ruler. Left mouse click and drag to the right until you reach the 5 inch mark on the horizontal ruler. Release the mouse button.
- Place your cursor over the center of the top ruler. Left mouse click and drag down until you reach the 4 inch mark on the vertical ruler. Release the mouse button.
- Add 1 horizontal guide at 4 inches and 1 vertical guide at 5 inches.
